|
|
|
Migrating data from Foxpro to MySQL
This guide walks you through migrating data from Foxpro to MySQL in a few simple steps using ESF Database Migration Toolkit. Simplify complex migration tasks and save valuable time with our streamlined approach.
Foxpro vs. MySQL:
- FoxPro is a text-based, procedural programming language and database management system developed by Microsoft. It was widely used in the 1980s and 1990s for building database applications, known for its high performance in handling large databases. FoxPro evolved from FoxBASE and was later integrated into Microsoft's Visual FoxPro, which added object-oriented programming capabilities and a graphical user interface. Despite being discontinued in 2007, FoxPro remains in use for maintaining legacy systems and applications.
- MySQL is an open-source relational database management system (RDBMS) that provides a powerful and scalable platform for managing and storing data. Developed by Oracle Corporation, MySQL is widely used in web applications and is known for its reliability, flexibility, and ease of use. It supports various storage engines, including InnoDB for transactional processing and MyISAM for read-intensive applications, offering developers the flexibility to choose the engine that best suits their needs. With features like ACID compliance, replication support, and a thriving community of developers, MySQL is a popular choice for businesses of all sizes looking to build robust and efficient database-driven applications.
Prerequisite:
Software Required:
DMToolkit_x64.zip
(63.5 MiB)64-bit Windows application for ESF Database Migration Toolkit 12.2.09 (2025-07-17).
(md5: af00d640b9e71618ed20932c52f4688d)DMToolkit_win32.zip
(58.8 MiB)32-bit Windows application for ESF Database Migration Toolkit 12.2.09 (2025-07-17).
(md5: 1b7566ee53ff21b6dc8444741b9da73a)System Supported:
- Windows 7 or higher.
- Foxpro 2.6 or higher.
- MySQL 3.23 or higher.
Step by Step Wizard:
-
Configure Visual FoxPro or FoxPro/dBase Data Source
- In the "Choose a Data Source" dialog:
- Select either:
- "Visual Foxpro Database (*.dbc)"
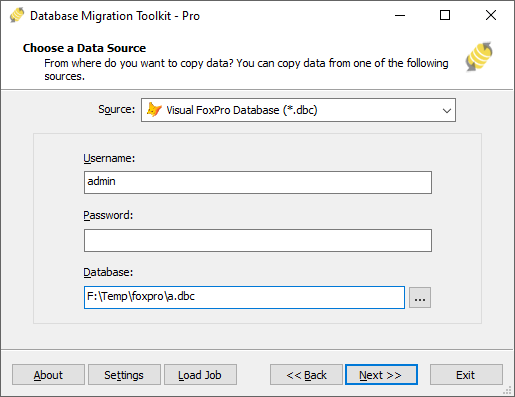
Fig. 1: Visual FoxPro Database (*.dbc) configuration - or "FoxPro/dBase Free Table (*.dbf)"
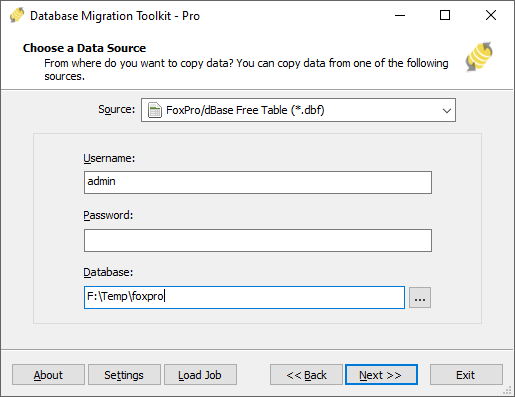
Fig. 2: FoxPro/dBase Free Table (*.dbf) configuration
- "Visual Foxpro Database (*.dbc)"
- Select either:
- File/folder selection:
- Click the "..." button (Browse)
-
For Visual FoxPro Database:
- Browse to and select your .dbc file
-
For FoxPro/dBase Free Tables:
- Select the folder containing your .dbf files
- In the "Choose a Data Source" dialog:
-
Configure MySQL Destination
- In the "Choose a Destination" dialog:
- Select "MySQL"
- Enter connection parameters:
- Server name:
localhost(default) - Port:
3306(default) - Username and Password
- Server name:
- Optional configurations:
- Select a MySQL storage engine
- Specify character set (e.g.,
UTF-8)
- Database selection/creation:
- Click the Refresh button to list available databases
- Either:
- Select existing database from list
- Or enter new database name
- Note: New databases will be automatically created during migration
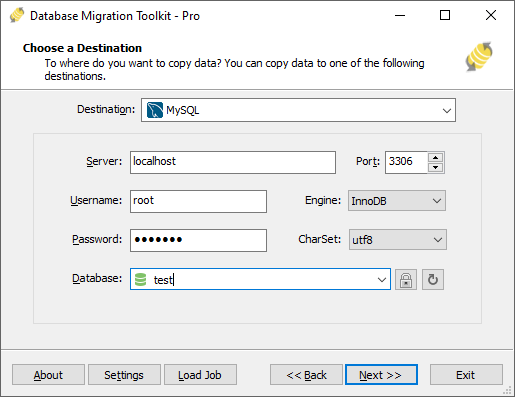
Fig. 3: MySQL destination configuration - In the "Choose a Destination" dialog:
-
In "Select Source Table(s) & View(s)" Dialog
-
Select migration objects: Choose tables or views to include in the migration.
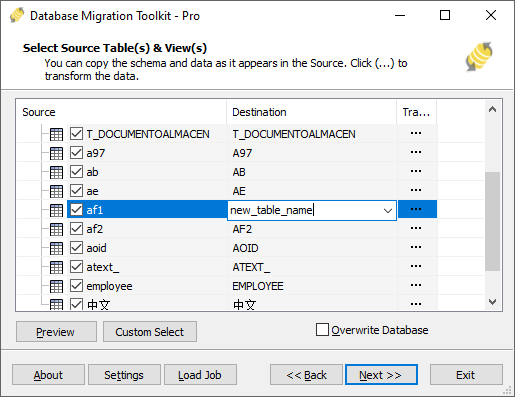
Fig. 4: Select tables and views -
Modify table structure: Click the ellipsis (...) button to access table options and schema adjustments.
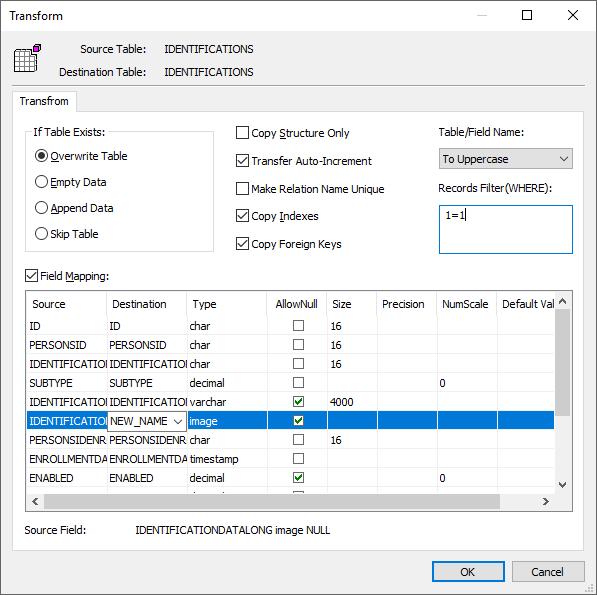
Fig. 5: Do transform -
Configure field mapping: In the Field Mapping options:
- Customize destination fields (name, data type, default value, comments)
- Select data transfer method:
- Overwrite Table (replace existing data)
- Empty Data (truncate before insert)
- Append Data (add to existing data)
- Skip Table (exclude from transfer)
- Apply data filters before transfer
-
Select migration objects: Choose tables or views to include in the migration.
-
Execution Dialog
-
Start migration: Click "Submit" to initiate automated data transfer from Foxpro to MySQL.
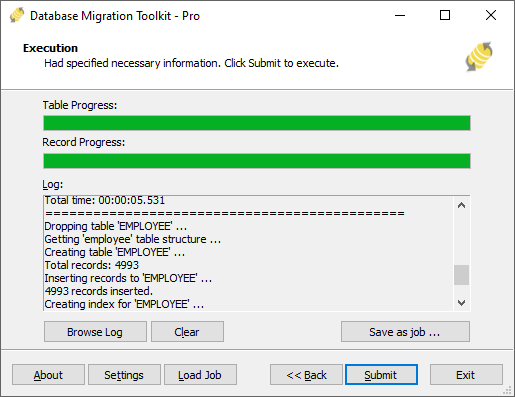
Fig. 6: Execute migration - Monitor progress: Click "Browse Log" for real-time migration tracking, including issue resolution details.
-
Save configuration: Click "Save as job" to store settings for:
- Quick reloads of migration jobs
- Command-line execution (use:
dmtc.exe --helpfor parameter options)
-
Start migration: Click "Submit" to initiate automated data transfer from Foxpro to MySQL.
-
Finished!
After migration completes, the toolkit generates a comprehensive report for verifying migration accuracy. You can monitor progress as the automated process runs efficiently. For any questions or feedback, contact us – our team is ready to assist.