Migrate Your SQLite Data to Oracle – Effortlessly!
This clear guide demonstrates how to transfer your data from SQLite to Oracle efficiently using ESF Database Migration Toolkit.- Execute a step-by-step, reliable migration process.
- Simplify complex data transfers with an intuitive tool.
- Save significant time and effort with automation.
- Modernize your data infrastructure with ease.
Prerequisite:
Software Required:
ESF Database Migration Toolkit »System Supported:
- Windows 7 or higher.
- SQLite 2 or higher.
- Oracle 11g or higher.
Step by Step Wizard:
-
Configure SQLite Data Source
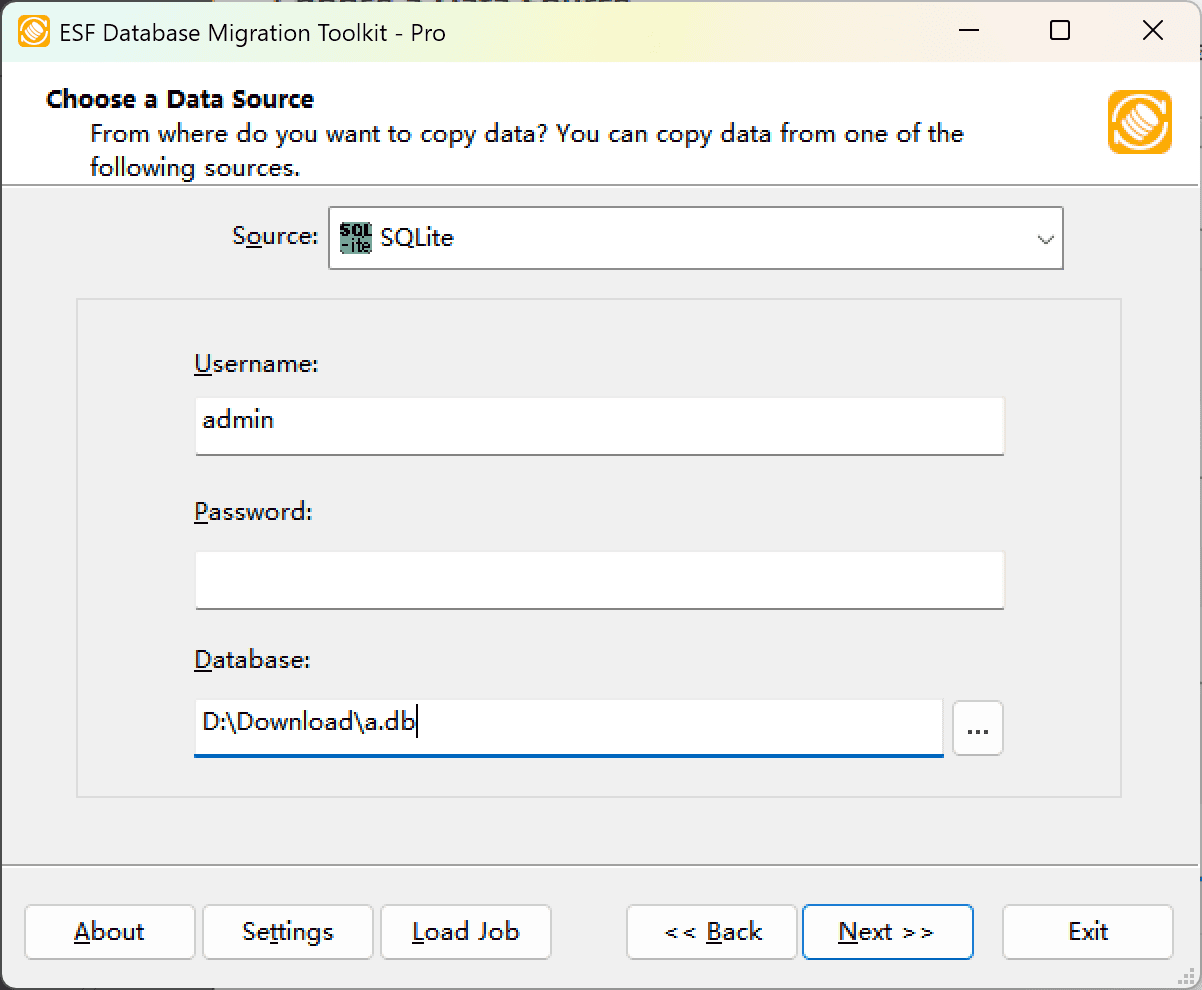
Fig. 1: SQLite data source configuration - In the "Choose a Data Source" dialog:
- Select "SQLite"
- Database file selection:
- Click the "..." button (Browse)
- Select your SQLite database file (.db, .db3, .sqlite, or .sqlite3)
- In the "Choose a Data Source" dialog:
-
Configure Oracle Destination
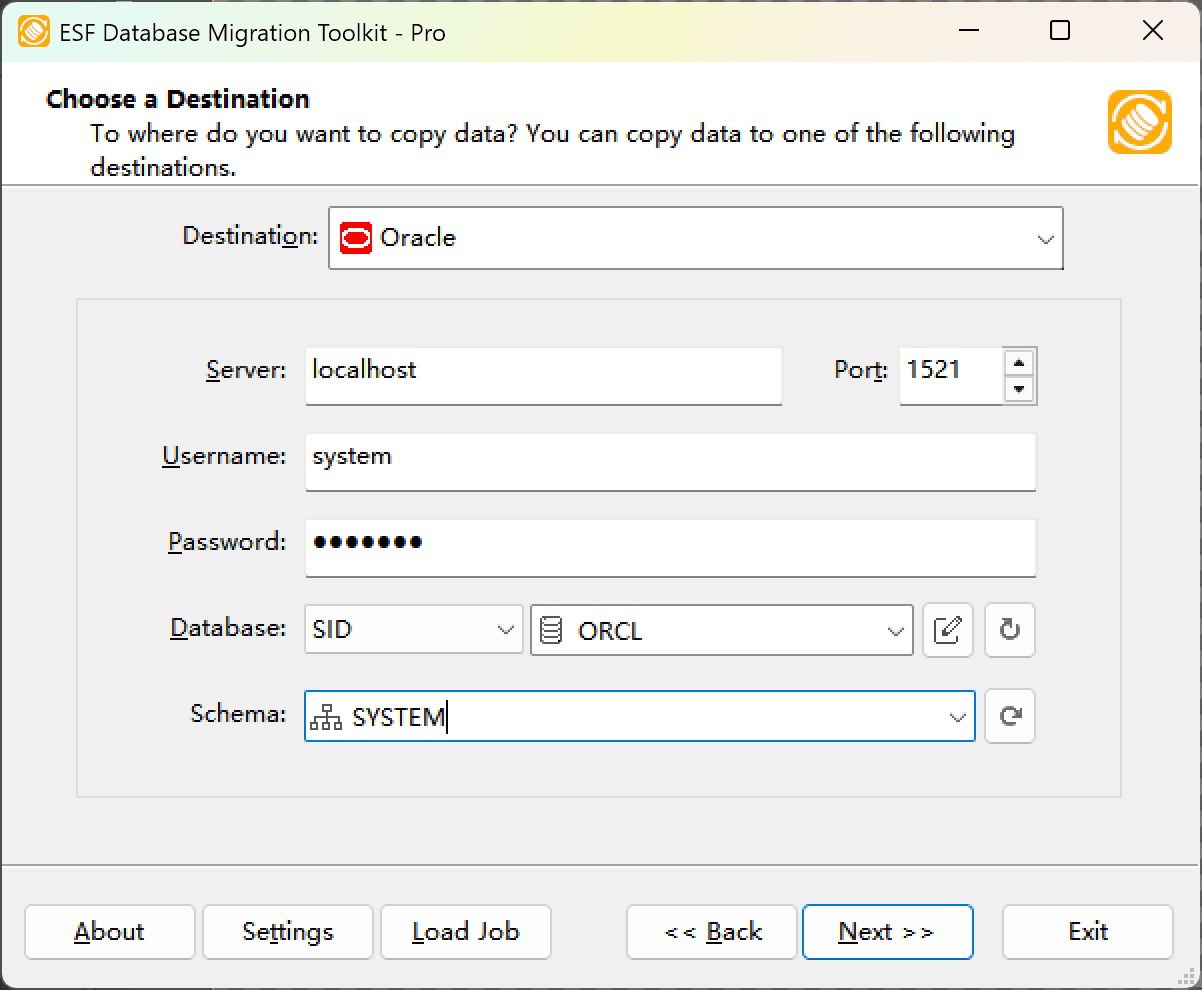
Fig. 2: Oracle destination configuration - In the "Choose a Destination" dialog:
- Select "Oracle"
- Enter server details:
- Server name:
localhost(default) - Port:
1521(default)
- Server name:
- Provide authentication credentials:
- Username:
SYSTEM(default) - Password
- Username:
- Select logon method:
- SID
- Service_Name
- TNS
- Configure database connection:
- For SID/Service_Name: Enter value in Database field
- For TNS: Leave Database field blank
- Schema configuration:
- Enter schema name (default: same as username)
- Click the Refresh button to view available schemas
- In the "Choose a Destination" dialog:
-
In "Select Source Table(s) & View(s)" Dialog
-
Select migration objects: Choose tables or views to include in the migration.
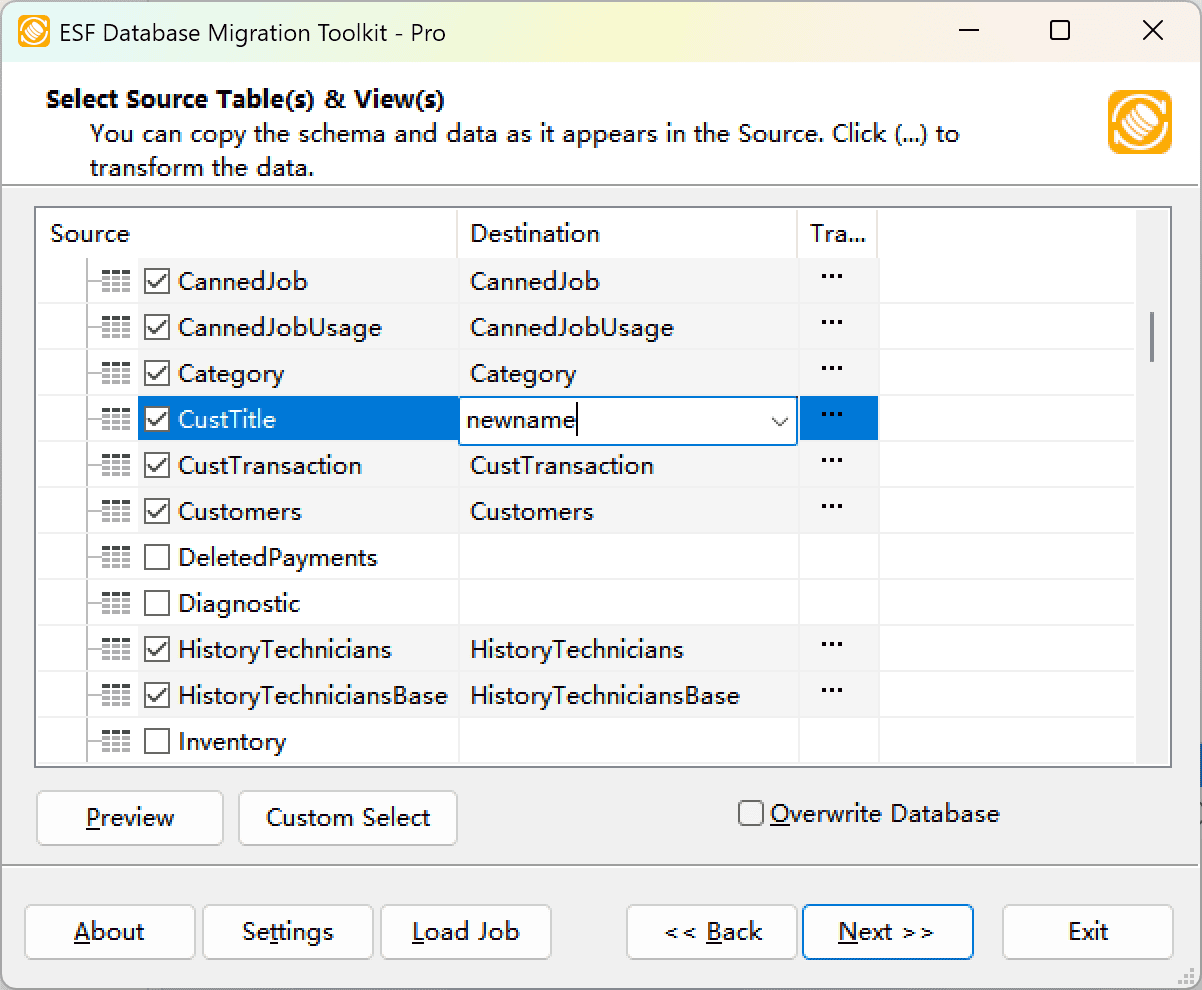
Fig. 3: Select tables and views -
Modify table structure: Click the ellipsis (...) button to access table options and schema adjustments.
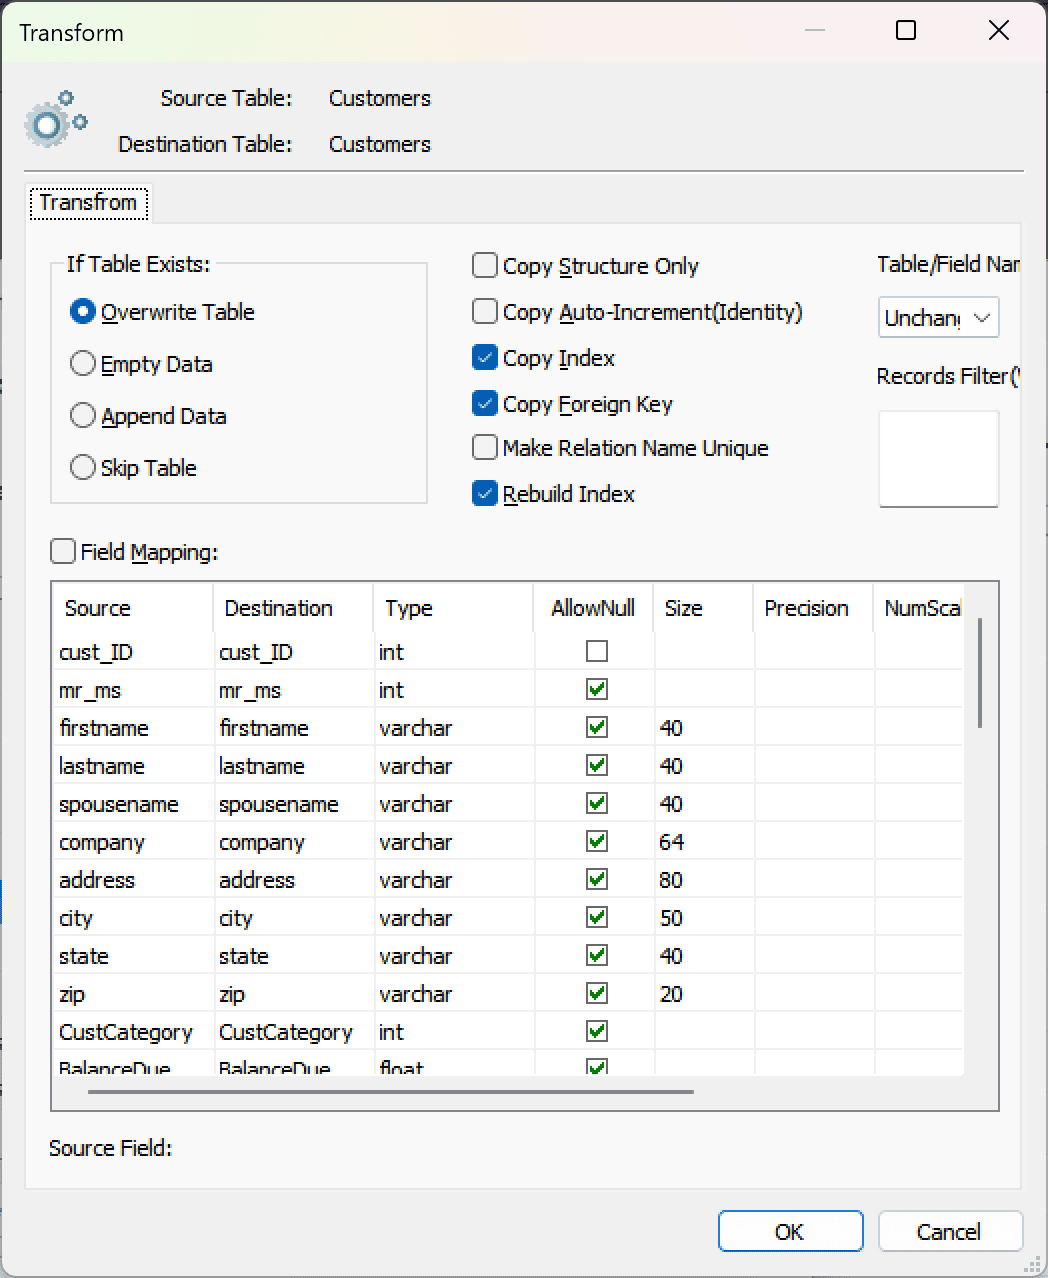
Fig. 4: Do transform -
Configure field mapping: In the Field Mapping options:
- Customize destination fields (name, data type, default value, comments)
- Select data transfer method:
- Overwrite Table (replace existing data)
- Empty Data (truncate before insert)
- Append Data (add to existing data)
- Skip Table (exclude from transfer)
- Apply data filters before transfer
-
Select migration objects: Choose tables or views to include in the migration.
-
Execution Dialog
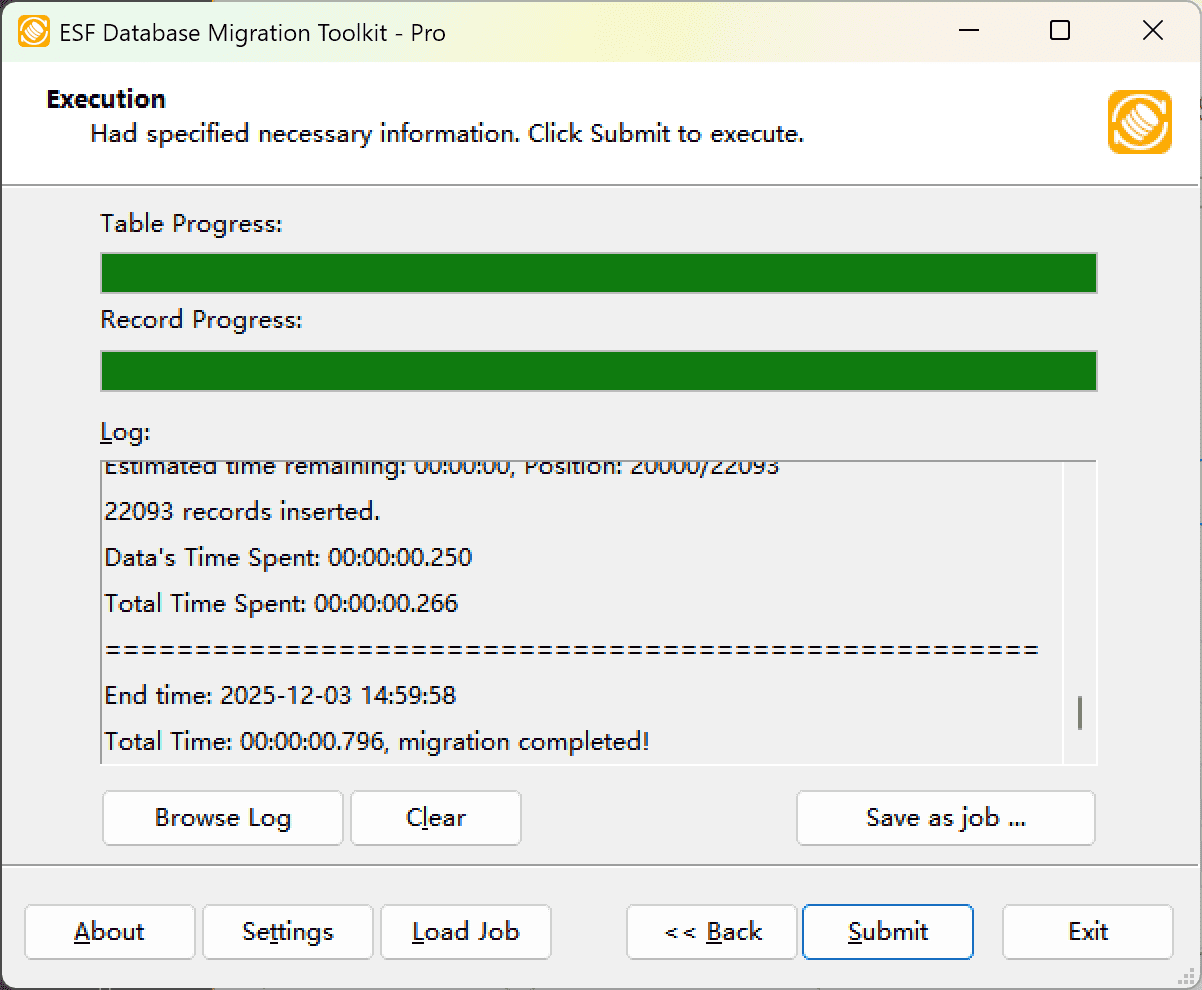
Fig. 5: Execute migration - Start migration: Click "Submit" to initiate automated data transfer from SQLite to Oracle.
- Monitor progress: Click "Browse Log" for real-time migration tracking, including issue resolution details.
-
Save configuration: Click "Save as job" to store settings for:
- Quick reloads of migration jobs
- Command-line execution (use:
dmtc.exe --helpfor parameter options)
-
Migration Completed
Congratulations! Your data migration from SQLite to Oracle has finished successfully. This toolkit generates a comprehensive report for verifying migration accuracy. You can monitor progress as the automated process runs efficiently. For any questions or feedback, contact us – our team is ready to assist.